In the transformer world, the terms "loop feed" and "radial feed" are most commonly associated with the HV bushing layout for compartmentalized padmount transformers. These terms, however, did not originate with transformers. They come from the broader concept of power distribution in electrical systems (or circuits). A transformer is called a loop feed transformer because its bushing configuration is tailored toward a loop distribution system. The same applies to transformers we classify as radial feed—their bushing layout is typically suited toward radial systems.
Of the two types of transformers, the loop feed version is the most adaptable. A loop feed unit can accommodate both radial and loop system configurations, whereas radial feed transformers almost always appear in radial systems. To gain a clearer understanding of this concept, we’ll begin with a basic description of 1) loop and radial distribution systems, and then we’ll examine how such systems relate to and influence 2) padmounted transformer bushing configurations. For some projects, there is flexibility on a transformer’s bushing layout, while other installations may require a more specific setup.
Radial and Loop Feed Distribution Systems
Both radial and loop systems aim to accomplish the same thing: send medium voltage power from a common source (usually a substation) to one or more step-down transformers serving a load.
Radial feed is the simpler of the two. Imagine a circle with several lines (or radians) proceeding from one center point, as shown in Figure 1. This center point represents the source of power, and the squares at the end of each line represent step-down transformers. In this setup, each transformer is fed from the same point in the system, and if the power source is interrupted for maintenance, or if a fault occurs, the entire system goes down until the issue is resolved.

Figure 1: The above diagram shows transformers connected in a radial distribution system. The center point represents the source of electrical power. Each square represents an individual transformer fed from the same single power supply.
Figure 2: In a loop feed distribution system, transformers can be fed by multiple sources. If a failure of the feeder cable upwind of Source A occurs, the system may be powered by the feeder cables connected to Source B with no significant loss of service.
In a loop system, power can be supplied from two or more sources. Instead of feeding transformers from one central point as in Figure 1, the loop system shown in Figure 2 offers two separate locations from which power may be supplied. If one power source goes offline, the other can continue to supply power to the system. This redundancy provides continuity of service and makes the loop system the preferred choice for many end users, such as hospitals, college campuses, airports, and large industrial complexes. Figure 3 gives a close-up view of two transformers depicted in the loop system from Figure 2.

Figure 3: The above drawing shows two loop feed configured transformers connected together in a loop system with the option of being fed from one of two power supplies.
The distinction between radial and loop systems can be summarized as follows:
- If a transformer receives power from only one point in a circuit, then the system is radial.
- If a transformer is capable of receiving power from two or more points in a circuit, then the system is loop.
A close examination of the transformers in a circuit may not clearly indicate whether the system is radial or loop; as we pointed out at the beginning, both loop feed and radial feed transformers can be configured to work in either circuit configuration (though again, it is rare to see a radial feed transformer in a loop system). An electrical blueprint and single-line is the best way to determine a system’s layout and configuration. That being said, with a closer look at the primary bushing configuration of radial and loop feed transformers, it is often possible to draw a well-informed conclusion about the system.
Radial and Loop Feed Bushing Configurations
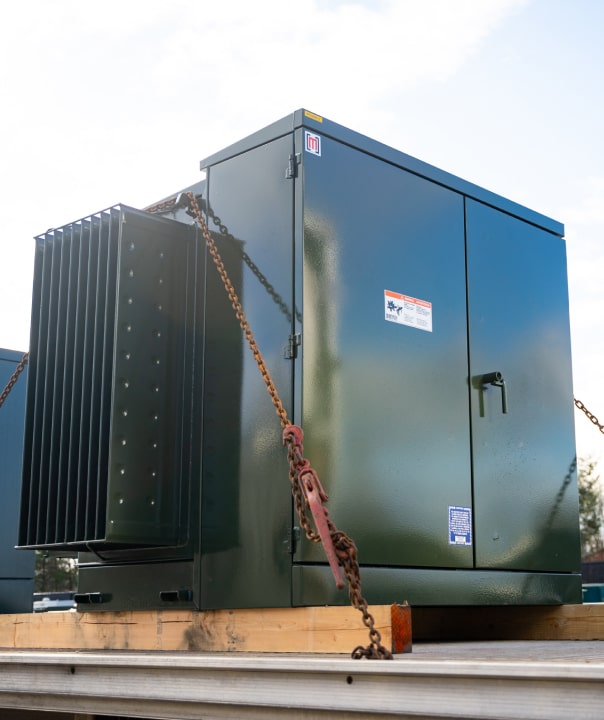
In padmount transformers, the main distinction between radial and loop feed lies in the primary/HV bushing configuration (the left side of the transformer cabinet). In a radial feed primary, there is one bushing for each of the three incoming phase conductors, as shown in Figure 4. This layout is most often found where only one transformer is needed to power an entire site or facility. As we will see later on, radial feed transformers are often used for the last unit in a series of transformers connected together with loop feed primaries (see Figure 6).

Figure 4: Radial feed configurations are designed for one incoming primary feed.
Loop feed primaries have six bushings instead of three. The most common arrangement is known as a V Loop with two sets of three staggered bushings (see Figure 5)—three bushings on the left (H1A, H2A, H3A) and three on the right (H1B, H2B, H3B), as outlined in IEEE Std C57.12.34.

Figure 5: A loop feed configuration offers the possibility of having two primary feeds.
The most common application for a six-bushing primary is to connect several loop feed transformers together. In this setup, the incoming utility feed is brought into the first transformer in the lineup. A second set of cables runs from the B-side bushings of the first unit to the A-side bushings of the next transformer in the series. This method of daisy-chaining two or more transformers in a row is also referred to as a “loop” of transformers (or “looping transformers together”). It is important to make the distinction between a “loop” (or daisy chain) of transformers and loop feed as it relates to transformer bushings and electrical distribution systems. Figure 6 outlines a perfect example of a loop of transformers installed in a radial system. If power is lost at the source, all three transformers will be offline until power is restored. Note, a close examination of the radial feed unit on the far right would indicate a radial system, but this would not be as clear if we only looked at the other two units.

Figure 6: This group of transformers is fed from a single source beginning at the first transformer in the series. The primary feed is passed on through each transformer in the lineup to the final unit where it is terminated.
Internal primary side bayonet fuses can be added to each transformer, as shown in Figure 7. Primary fusing adds an additional layer of protection for the electrical system—especially when several transformers connected together are individually fused.

Figure 7: Each transformer is outfitted with its own internal overcurrent protection.
If a secondary side fault occurs on one unit (Figure 8), the primary fusing will interrupt the flow of overcurrent at the faulted transformer before it’s able to reach the rest of the units, and normal current will continue to flow past the faulted unit to the remaining transformers in the circuit. This minimizes downtime and consigns the failure to a single unit when several units are connected together in one branch circuit. This setup with internal overcurrent protection may be used in radial or loop systems–in either case, the expulsion fuse will isolate the faulted unit and the load it serves.

Figure 8: In the event of a load side fault on one unit in a series of transformers, primary side fusing will isolate the faulted unit from the other transformers in the loop–preventing further damage and allowing unbroken operation for the rest of the system.
Another application of the loop feed bushing configuration is to connect two separate source feeds (Feed A and Feed B) to a single unit. This is similar to the earlier scenario in Figure 2 and Figure 3, but with a single unit. For this application, one or more oil-immersed rotary-type selector switches are installed in the transformer, allowing the unit to alternate between the two feeds as needed. Certain configurations will allow switching between each source feed with no momentary loss of power to the load being served—a crucial advantage for end users who value electrical service continuity.

Figure 9: The above diagram shows one loop feed transformer in a loop system with the option of being fed from one of two power supplies.
Here is another example of a loop feed transformer installed in a radial system. In this situation, the primary cabinet has only one set of conductors landed on the A-side bushings, and the second set of B-side bushings is terminated with either insulated caps or elbow arresters. This arrangement is ideal for any radial feed application where only one transformer is required in an installation. Installing surge protective devices on the B-side bushings is also the standard configuration for the last transformer in a chain or series of loop feed units (conventionally, surge protection is installed at the last unit).

Figure 10: Here is an example of a loop feed primary with six bushings where the second three B-side bushings are terminated with dead front elbow arresters. This configuration works for a single transformer by itself, and it also is used for the last transformer in a series of connected units.
It’s also possible to replicate this configuration with a three-bushing radial feed primary using rotatable feed-through (or feedthru) inserts. Each feed-through insert gives you the option to install one cable termination and one dead front elbow arrester per phase. This configuration with feed-through inserts also makes landing another set of cables for loop system applications possible, or the additional three connections could be used to feed power to another transformer in a series (or loop) of units. The feed-through configuration with radial transformers does not allow for the option of selecting between a separate set of A-side and B-side bushings with internal switches at the transformer, which makes it an undesirable choice for loop systems. Such a unit could be used for a temporary (or rental) solution when a loop feed transformer is not readily available, but it is not an ideal permanent solution.

Figure 11: Rotatable feed-through inserts may be used to add arresters or another set of outgoing cables to a radial feed bushing setup.
As mentioned at the start, loop feed transformers are used widely in radial systems since they can easily be outfitted for stand-alone operation as shown above in Figure 10, but they are almost always the exclusive choice for loop systems due to their six-bushing layout. With the installation of oil-immersed selector switching, multiple source feeds can be controlled from the primary cabinet of the unit.
The principle with selector switches involves breaking the flow of current at the transformer’s coils just like a simple on/off switch with the additional capability of redirecting current flow between the A-side and B-side bushings. The easiest selector switch configuration to understand is the three two-position switch option. As Figure 12 shows, one on/off switch controls the transformer itself, and the two additional switches control the A-side and B-side feeds individually. This configuration is perfect for loop system setups (as in Figure 9 above) which require selecting between two separate sources at any given time. It also works well for radial systems with multiple units daisy-chained together.

Figure 12: An example of a transformer with three individual two-position switches on the primary side. This type of selector switching may also be employed with a single four-position switch, however, the four-position option is not quite as versatile, as it does not allow on/off switching of the transformer itself irrespective of the A-side and B-side feeds.
Figure 13 shows three transformers, each with three two-position switches. The first unit on the left has all three switches in the closed (on) position. The transformer in the middle has both the A-side and B-side switches in the closed position, while the switch controlling the transformer coil is in the open (off) position. In this scenario, power is supplied to the load being served by the first transformer and the last transformer in the group, but not to the middle unit. The individual A-side and B-side on/off switches allow the flow of current to be passed on to the next unit in the lineup when the on/off switch for the transformer coil is open.

Figure 13: By utilizing multiple selector switches at each transformer, the unit in the center may be isolated without a loss of power to the adjacent units.
There are other possible switch configurations, such as a four-position switch–which in a way combines the three individual two-position switches into one device (with a few differences). Four position switches are also referred to as “loop feed switches” since they are exclusively used with loop feed transformers. Loop feed switches may be used in radial or loop systems. In a radial system, they are used to isolate a transformer from others in a group as in Figure 13. In a loop system, such switches are more often used to control power from one of two incoming sources (as in Figure 9).
A deeper look at loop feed switches is beyond the scope of this article, and the brief description of them here is used to show the significant part internal transformer selector switches play in loop feed transformers installed in radial and loop systems. For most situations where a replacement transformer is needed in a loop feed system, the type of switching discussed above will be required. Three two-position switches offer the most versatility, and for this reason, they are an ideal solution in a replacement transformer installed in a loop system.
Summary
As a general rule of thumb, a radial feed pad-mounted transformer usually indicates a radial system. With a loop feed pad-mounted transformer, it can be harder to make a determination about the circuit configuration. The presence of internal oil-immersed selector switches will often indicate a loop system, but not always. As mentioned at the start, loop systems are commonly used where continuity of service is required, such as hospitals, airports, and college campuses. For critical installations such as these, a specific configuration will almost always be required, but many commercial and industrial applications will allow some flexibility in the configuration of the pad-mounted transformer being supplied–especially if the system is radial.
If you’re new to working with radial and loop feed pad-mounted transformer applications, we recommend keeping this guide handy as a reference. We know it isn’t comprehensive, though, so feel free to reach out to us if you have additional questions. We also work hard to keep our inventory of transformers and parts well-stocked, so let us know if you have a specific application need.